


Views: 0 Author: Site Editor Publish Time: 2026-10-05 Origin: Site


Decorative containers frequently ship without drainage holes. This forces growers to choose between risking root rot or risking structural damage to the container during modification. Modifying these containers introduces mechanical stress or thermal risks. Incorrect techniques lead to cracked containers, ruined aesthetics, or inadequate water flow. This results in wasted capital and plant loss. Evaluating the structural realities of different plastic types is necessary before applying mechanical or thermal modifications. This guide breaks down the technical approaches, required tools, and scalability of each method. You will learn how to implement successful drainage systems for your plastic plant pots without destroying them. We cover everything from drill bit selection to thermal melting techniques. Proper preparation ensures you get clean holes without shattering expensive planters.
Tool-to-Material Matching: Rigid, injection-molded plastics require mechanical drilling with metal bits, while thin, blow-molded plastics respond better to thermal melting or punching.
Risk Mitigation: Using masking tape prevents drill bit slippage, while proper ventilation is a non-negotiable safety requirement for thermal modification due to toxic off-gassing.
Optimal Drainage Architecture: A single central hole is often insufficient; effective drainage requires a distributed pattern across the lowest points of the container, sometimes including the lower sides.
The Scalability Threshold: For high-volume operations, manual modification becomes cost-prohibitive, making the procurement of commercial nursery pots with drainage holes the most viable financial decision.
Effective drainage goes beyond simply letting water escape. You must define the volumetric requirements for water expulsion and oxygen exchange. Plant roots require oxygen to function properly. When water saturates the soil profile without an exit route, it displaces all available oxygen. This creates anaerobic soil conditions. Anaerobic environments promote the rapid growth of pathogenic fungi and bacteria. These pathogens cause root rot, which quickly kills healthy plants.
A proper drainage system allows excess moisture to exit the container rapidly. As water leaves the soil matrix, it pulls fresh air down into the root zone. This continuous gas exchange keeps the substrate healthy and supports vigorous root development. You can measure the success of your drainage by observing the runoff. Water should begin exiting the bottom of the container within thirty seconds of a heavy surface application. If water pools on the soil surface for several minutes, your drainage architecture is failing.
The physical location of your drainage holes dictates their effectiveness. You must analyze the difference between bottom drainage and side-bottom drainage. Many decorative containers feature completely flat bottoms. If a pot sits completely flat on a patio or saucer, bottom holes can become sealed against the surface. This traps water inside the container. Water surface tension can also prevent moisture from escaping through small bottom holes.
To combat this, adding supplementary holes to the lower sides of the container is mandatory. Side-bottom holes ensure continuous airflow and reliable water expulsion. Containers with elevated ridges or built-in feet naturally facilitate better bottom drainage. Always evaluate the resting footprint of your container before planning your hole distribution. A distributed pattern across the lowest points prevents isolated pockets of saturated soil.
Container Base Type | Primary Hole Location | Supplementary Hole Location | Risk of Water Trapping |
|---|---|---|---|
Completely Flat Base | Center and outer edges of bottom | Lower side walls (1/2 inch from base) | High (Requires side holes) |
Elevated Ridges / Feet | Lowest recessed points on bottom | None required | Low (Airflow exists underneath) |
Concave Base (Domed inward) | Outer perimeter of the bottom ring | Lower side walls | Medium (Water pools at the edges) |
Creating holes of the correct diameter prevents operational headaches later. You must establish the minimum diameter required to prevent soil clogging. If holes are too small, soil particles and root debris will quickly block them. If holes are too large, expensive substrate will wash out during every watering cycle. Standard practice dictates a minimum diameter of 1/4 inch for small containers. Larger containers holding several gallons of soil require 1/2-inch holes.
Proper grower pot drainage design eliminates the need for secondary mesh screens. Mesh screens often degrade or become clogged with mineral buildup over time. Focus on drilling the correct size and quantity of holes rather than relying on internal barriers. A well-designed hole pattern allows fine silt to wash out initially while retaining the primary soil structure.
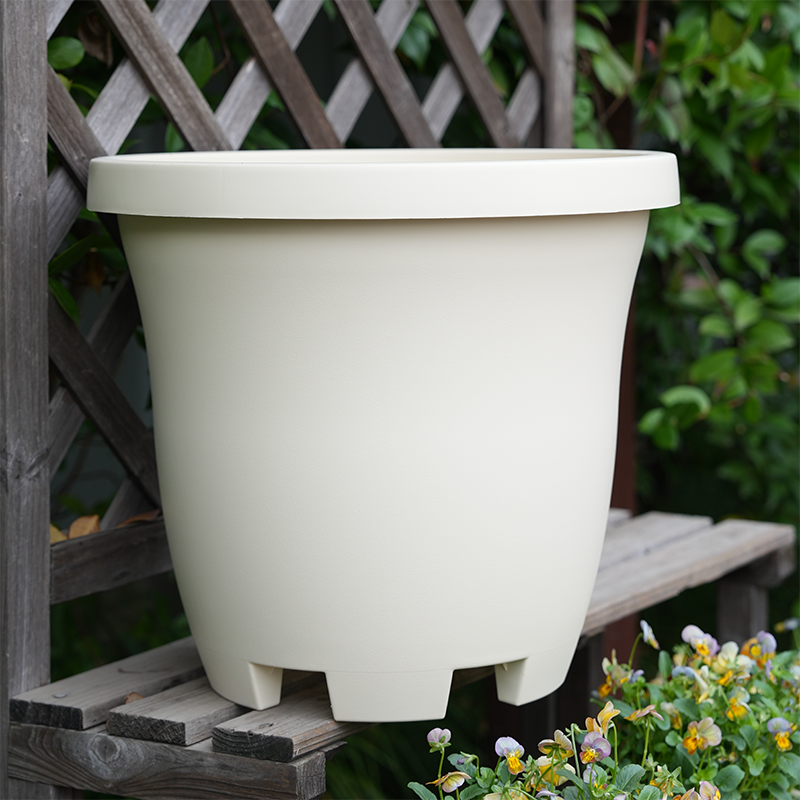
Preparation prevents catastrophic failures during container modification. Never attempt to modify an actively potted plant. Leaving the plant inside the container risks severe root damage. Drill bits and hot tools can easily catch on root masses or plunge too deeply into the root ball. Always remove the plant and substrate completely. Clean the target area to remove dirt or debris that could cause tools to slip.
Follow this strict sequence before applying any tools to your containers:
Extract the plant and root ball entirely, placing it in a temporary holding tray.
Wash the interior base of the container to remove soil grit and mineral deposits.
Dry the exterior surface completely so masking tape will adhere properly.
Invert the empty planter onto a hard, stable surface like a heavy workbench.
Position a wood backing block inside the container directly behind the target drill zone.
This ensures proper leverage and prevents structural flexing. Flexing is the primary cause of cracking during mechanical modification.
Thick plastics require a mechanical approach to remove material cleanly. This method works best for heavy-duty containers that resist bending. You must control the speed and pressure of the drill to prevent the plastic from shattering.
Tools Required: You need a variable speed drill and standard metal twist drill bits. Avoid brad-point wood bits. Use masonry bits for extremely dense composites. Gather masking tape and a scrap wood backing block.
Implementation Protocol: Invert the pot on a hard surface. Apply a strip of masking tape directly over the target area. The tape provides traction and prevents the drill bit from wandering across slick plastic. Place the wood block tightly inside the pot, directly against the target zone. The wood supports the plastic and prevents blowout on the exit wound. Apply low RPMs and steady, moderate pressure.
Implementation Risks & Mitigation: High RPMs cause friction melting. Melted plastic binds to the drill bit, ruining the hole and the tool. Excessive downward pressure causes radial cracking across the bottom of the pot. Mitigate these risks by letting the drill bit do the cutting. Never force the tool through the material. Clear plastic shavings from the bit after every hole.
Thin plastics often shatter when subjected to the blunt force of a drill. Thermal modification removes material by melting it, eliminating mechanical stress entirely. This method is highly effective for nursery liners and lightweight decorative pots.
Tools Required: Use a dedicated soldering iron, a specialized pot punch perforator, or a heated metal skewer held by locking pliers. Keep a damp sponge nearby.
Implementation Protocol: Heat the tool to its optimal melting temperature. Apply direct, perpendicular pressure to the bottom or lower sides of the plastic. The hot metal will glide through the material instantly. Allow the melted edges to cool naturally. This forms a reinforced lip around the new hole. The reinforced lip prevents micro-tears from propagating under stress.
Implementation Risks & Mitigation: Melting plastic releases toxic polymer fumes. Inhalation of these fumes poses a severe health risk. Mitigation requires performing this task outdoors or under industrial ventilation. Never melt plastic in an enclosed room. A secondary risk involves melted plastic adhering to your tool. Wipe the hot tool immediately on a damp sponge to keep it clean and prevent burning residue.
Soft, pliable plastics respond well to sharp cutting tools. This method is fast but requires precision to avoid injury. It is generally reserved for thin-walled temporary containers.
Tools Required: Gather a heavy-duty hole punch, a sharp utility knife, or a leather punch.
Implementation Protocol: Isolate the bottom edge of the container. Use a punch tool for uniform circular removal. Position the punch over the plastic and squeeze firmly. Alternatively, use a utility knife to cut V-notches along the bottom rim. V-notches allow water to escape from the sides of the base, preventing surface tension locks.
Implementation Risks & Mitigation: This method carries a high risk of physical injury due to blade slippage. Flexible plastic can suddenly give way, causing the knife to jerk. There is also a high risk of creating jagged edges. Jagged edges propagate tears under the heavy weight of wet soil. Mitigate these risks by using sharp, dedicated punch tools rather than dragging a blade through the material.
Modification Method | Ideal Plastic Type | Required Tools | Primary Risk Factor |
|---|---|---|---|
Mechanical Drilling | Thick, rigid, injection-molded | Variable speed drill, metal bits, masking tape, wood block | Radial cracking from excessive pressure or high RPMs |
Thermal Melting | Thin, brittle, blow-molded | Soldering iron, heated skewer, damp sponge | Toxic fume inhalation from melting polymers |
Puncturing / Slicing | Soft, highly flexible plastics | Heavy-duty hole punch, sharp utility knife | Physical injury from blade slippage; jagged edges |
Injection-molded containers dominate the premium planter market. Manufacturers inject molten plastic into solid molds to create thick, heavy-duty walls. These containers feel rigid and resist bending when squeezed. You can often identify them by locating the injection gate mark, which looks like a small, rough circle on the exact center of the bottom.
Because they are stiff, they are highly prone to shattering under blunt force. Hitting them with a hammer and nail will cause immediate, irreparable cracking. Modifying injection-molded plastics requires careful drilling with sharp metal bits. You must support the plastic from behind to prevent the exit hole from blowing out. Take your time, use low speeds, and let the drill bit shave the plastic away gradually to achieve clean results.
Blow-molded containers represent the standard for temporary nursery housing. Manufacturers inflate hot plastic tubes inside a mold to create thin, lightweight walls. These pots feel flexible and easily deform under pressure. You can identify them by looking for a pinch-off seam that runs straight across the bottom of the container.
Because they are thin, they are prone to tearing when drilled. Drill bits tend to grab the thin plastic, twisting and ripping the material rather than cutting a clean hole. Blow-molded plastics respond best to thermal melting or sharp punching. A hot soldering iron glides through this material instantly. This leaves a clean hole with a melted, reinforced edge that resists future tearing under the weight of wet soil.
High-end decorative planters often utilize resin and fiberglass blends. These materials mimic the look of stone, concrete, or ceramic while remaining lightweight. You can identify them by inspecting the interior walls; fiberglass blends often show a woven texture or rough fibrous strands on the inside.
Fiberglass blends are highly abrasive to standard tools. They will quickly dull standard high-speed steel drill bits. Modifying these containers requires specialized masonry bits designed for abrasive materials. Furthermore, drilling fiberglass releases fine particulate dust. This dust irritates the skin, eyes, and lungs. You must wear proper respiratory protection and safety goggles when modifying resin and fiberglass blends. Work outdoors to prevent dust accumulation in your workspace.
Modifying containers by hand makes sense for small residential collections. It allows you to utilize decorative pots that lack factory drainage. However, manual modification requires time, tools, and physical effort. You must calculate the time investment of modifying individual containers.
Compare this labor cost against the unit cost of purchasing purpose-built plastic grower pots. If you spend ten minutes carefully taping, blocking, and drilling a single container, the labor cost quickly outweighs the value of the pot itself. Recognize when DIY modification ceases to be economically viable. For commercial growers, paying staff to drill holes manually destroys profit margins.
Commercial growing operations cannot rely on manual pot modification. For operations requiring dozens or hundreds of containers, manual drilling creates massive labor bottlenecks. It also introduces inconsistencies in drainage performance. One poorly drilled pot can lead to a lost plant, compounding the financial damage.
Transitioning to commercial nursery pots with drainage holes eliminates these issues entirely. Factory-produced nursery pots feature optimized drainage configurations engineered for specific soil volumes. They ensure uniform water expulsion across your entire crop. Purchasing pre-drilled containers standardizes your operation, reduces labor costs, and guarantees reliable performance for every plant in your inventory.
Sometimes modifying a decorative pot is simply too risky. Rare or expensive containers may crack despite your best efforts. In other scenarios, drainage runoff cannot be managed safely indoors without ruining hardwood floors or carpets. When modification is not an option, evaluate alternative strategies.
You can integrate self-watering plastic planters into your setup. These systems manage moisture internally using a reservoir and wicking system, eliminating the need for external drainage holes. Alternatively, utilize the cachepot method. This involves placing a cheap, pre-drilled liner pot inside an unmodified decorative outer pot. You remove the liner pot for watering, let it drain completely in a sink, and then return it to the decorative shell. This protects your floors and preserves the aesthetic of the outer container.
Identify your container's material thickness to select the correct modification tool before starting.
Apply masking tape and insert a solid wood backing block to prevent cracking when drilling rigid plastics.
Perform a water flush test on the empty modified container to verify flow rates and check for pooling.
Transition to pre-drilled commercial pots when your manual modification labor exceeds the container's replacement value.
A: Yes. Modifying a pot with the plant still inside risks severe root damage, soil spillage, and tool binding. Drill bits and hot tools can easily catch on roots, destroying the plant's vascular system. Always unpot the plant and invert the empty container on a hard surface first.
A: No. Brad-point wood bits feature sharp spurs that aggressively grab thin plastic. This grabbing action causes the plastic to twist, leading to severe cracking and shattering. You should always use standard twist bits designed for metal to ensure a smooth, controlled cut through plastic materials.
A: A standard 6-inch pot requires at least four 1/4-inch holes to ensure adequate drainage. Larger pots require more holes or larger diameters. If the pot sits completely flat on the ground, you must also add side-bottom holes to prevent water surface tension from trapping moisture inside.
A: No. Melting plastic releases volatile organic compounds (VOCs) and toxic fumes that are dangerous to inhale. You must never perform thermal modifications in enclosed indoor spaces. Always melt plastic outdoors or in a highly ventilated industrial area while wearing appropriate respiratory protection.
A: Cracking occurs due to mechanical stress. Applying too much downward pressure forces the plastic to bend and snap. Using too high of a drill speed causes the bit to bind. Failing to use masking tape for traction or lacking a wood backing block to absorb the force also leads to structural failure.
A: No. The drainage layer myth is dangerous for plants. Adding rocks creates a perched water table. This phenomenon actually keeps the saturated soil layer higher up in the pot, closer to the roots. Physical drainage holes are non-negotiable for proper water expulsion and gas exchange.
A: Thick resin and fiberglass blends are highly abrasive. Use a masonry bit at low speeds. Apply masking tape over the target area to prevent the bit from wandering on the slick surface. Support the inside of the planter with a wood block to prevent the exit hole from blowing out.


