


Views: 0 Author: Site Editor Publish Time: 2026-10-19 Origin: Site


Oversized container gardening presents a unique dual nature. A large outdoor planter serves as a high-impact architectural focal point that anchors a landscape, but it introduces significant technical challenges regarding weight, drainage, and climate durability. Many property owners experience common failure points in their decision-making process. They purchase containers based solely on aesthetics without accounting for volumetric soil weight, intense frost-thaw cycles, or proper interior preparation. This oversight routinely leads to cracked pots, structural deck damage, or severe root rot. Successful styling requires a highly systematic approach. You must match container geometry to existing architectural lines and select climate-appropriate materials. Engineering the interior for optimal drainage and weight management is non-negotiable. Finally, applying proven horticultural design frameworks ensures the visual arrangement matches the structural integrity of the container.
Architectural Matching: Container geometry (square, round, tapered) and finish must dictate the spatial flow and complement the primary structure's architectural lines.
Material Dictates Longevity: The choice between fiberglass, concrete, natural fiber, and terracotta directly impacts frost resistance, moisture retention, and structural load limits.
Interior Engineering is Mandatory: Filling a massive container entirely with soil creates immovable dead weight and poor aeration; structural false bottoms or void-fillers (occupying up to two-thirds of the base) are essential.
Design Composition: Professional styling relies on the "Thriller, Filler, Spiller" framework, bold color theory, and finishing touches to create balanced arrangements that scale appropriately with the container's volume.
Evaluating spatial constraints and architectural style dictates your container selection. You must ensure the planter anchors the space rather than obstructing it. An oversized pot in a narrow walkway creates a bottleneck. A small pot on a massive patio looks entirely out of place. The geometry of the container must interact intentionally with the surrounding hardscape. You evaluate success by how naturally the planter integrates into the existing structural environment. We look at footprint, height, and visual weight to determine the correct scale for any given outdoor area.
Curved lines naturally soften rigid architectural facades and harsh hardscapes. When you introduce tall round landscape planters into a space, they break up the monotony of right angles. These cylindrical shapes draw the eye upward while maintaining a fluid, organic footprint. You use them to break up the rigid grid lines of stamped concrete or brick pavers.
Placement strategies for round containers rely on spatial flow. You can use them to flank curved pathways, guiding foot traffic naturally toward an entrance or garden feature. They work exceptionally well for softening sharp patio corners where two retaining walls meet. In organic garden layouts, a massive round planter serves as a standalone focal point. It mimics the natural curves found in nature, bridging the gap between built environments and raw landscapes. Planting a weeping Japanese maple in a round container accentuates the cascading, circular form, creating a cohesive visual statement.
Square containers offer incredible utility in defining boundaries. You can align multiple units to create modular privacy walls. This approach works perfectly for dividing large patios into intimate seating areas without building permanent structures. A large square outdoor planter inherently complements contemporary, geometric architecture. The sharp right angles mirror the clean lines of modern homes, flat-roofed structures, and commercial buildings.
Selecting simple finishes maximizes this modern aesthetic. Smooth matte black, stark white, or raw concrete finishes align perfectly with minimalist architectural lines. Avoid ornate carvings or busy patterns on square planters, as they clash with the intended geometric simplicity. The volumetric capacity of square planters is another major advantage. The corner spaces provide additional room for root expansion. This extra volume easily supports larger root balls for small ornamental trees, dense privacy shrubbery like boxwoods, or tall ornamental grasses. You can line up three identical square planters along a property line to block an unsightly view effectively.
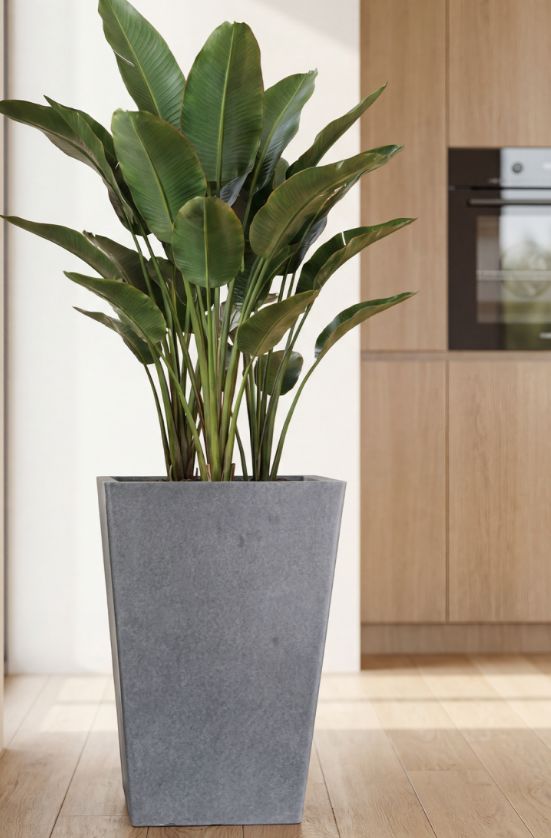
Tapered designs create a distinct visual forced-perspective. The wider top and narrower base draw the viewer's eye upward. This geometry makes tall tapered decorative planters feel lighter and less imposing than standard cylinders or cubes. They provide substantial height without consuming excessive floor space, making them highly efficient for tight areas.
You should use specific criteria when placing tapered planters to frame doorways or garage entrances. The narrow base ensures the container does not encroach on pedestrian walkways. Measure the width of your entryway and ensure the widest part of the planter leaves ample clearance for swinging doors and foot traffic. Tapered designs elevate the plant material closer to eye level, making them ideal for high-impact entryway statements. They present the foliage directly in the visitor's line of sight.
Planter Geometry | Architectural Pairing | Best Placement Strategy | Visual Effect |
|---|---|---|---|
Tall Round | Traditional, Transitional, Organic | Pathway flanks, patio corners, garden beds | Softens hard lines, creates fluid movement |
Large Square | Modern, Minimalist, Industrial | Property lines, modular privacy walls, deck perimeters | Defines boundaries, mirrors geometric architecture |
Tall Tapered | Contemporary, Eclectic | Entryways, front porches, garage framing | Elevates sightlines, saves floor space |
You must compare material specifications directly against environmental stressors. UV exposure fades cheap plastics. Freezing temperatures shatter porous ceramics. High wind shear easily tips over lightweight containers. Matching the material to your specific climate and placement location guarantees long-term structural integrity. We evaluate materials based on tensile strength, thermal expansion, and moisture retention.
Fiberglass and resin composites offer an exceptional strength-to-weight ratio. They are incredibly strong yet light enough for one person to move when empty. This makes them ideal for balconies or roof decks with strict load-bearing limits. You do not want to overload a suspended deck with solid concrete. The lightweight nature allows for seasonal rearranging without requiring a landscaping crew.
These materials also boast superior frost resistance. They lack porous expansion properties. Water cannot seep into the walls of a fiberglass pot. When temperatures drop below freezing, there is no trapped moisture to expand and cause winter cracking. They withstand extreme temperature fluctuations without compromising structural integrity. Cleaning fiberglass requires only mild soap and water. You never have to worry about rust, rot, or mineral buildup on the exterior surface.
Heavy materials like cast stone and concrete provide extreme durability and wind-resistance. If you live in a coastal area or a high-wind corridor, concrete is often necessary. These heavyweights will not blow over during severe storms. They offer a permanent, monumental presence in the landscape, anchoring large open spaces effectively.
However, you must address the implementation risks. Concrete requires permanent placement. Once filled, these containers are virtually immovable without heavy machinery. You must conduct structural deck assessments before installing concrete planters on elevated wooden surfaces. The combined weight of the pot, wet soil, and plant material easily exceeds structural limits. New concrete planters often leach alkaline compounds into the soil. You should flush a new concrete pot with water several times before planting acid-loving species like Japanese maples or azaleas.
Earthy, organic-looking materials carry immense aesthetic value. Terracotta and natural fiber pots blend seamlessly into traditional, Mediterranean, or rustic landscapes. They possess natural moisture-wicking properties. The porous walls allow the soil to breathe, which helps prevent root rot in overwatered plants. This makes them highly forgiving for novice gardeners who tend to overwater.
You must weigh these benefits against conceptual trade-offs. Porous clay is highly susceptible to frost-thaw damage in northern climates. Water absorbs into the terracotta, freezes, expands, and shatters the pot. If you use these materials in freezing zones, you must commit to strict winterization. This usually involves emptying the pots or moving them into indoor storage before the first hard freeze. Natural fiber pots, while beautiful, degrade over time when exposed to constant moisture and soil microbes.
Material Type | Weight Profile | Frost Resistance | Maintenance Requirement |
|---|---|---|---|
Fiberglass / Resin | Lightweight | Excellent | Low (Wash with mild soap) |
Concrete / Cast Stone | Extremely Heavy | Good | Medium (Requires structural assessment) |
Terracotta / Clay | Moderate to Heavy | Poor | High (Requires winter storage) |
Natural Fiber | Lightweight | Moderate | High (Degrades over time) |
Failing to prepare the interior of oversized containers leads to critical failures. Blocked drainage creates anaerobic soil conditions, rapidly inducing root rot. Excessive weight causes immobility and structural strain on patios. You must mitigate these risks before a single bag of soil is opened. Proper preparation extends the lifespan of both the container and the plants inside it.
Always plan for mobility before installation. Place heavy-duty plant caddies or hidden casters beneath the planter before adding any filler or soil. Once filled, oversized containers become dangerously heavy. Attempting to lift or drag a fully loaded pot can cause severe physical injury or damage to the flooring surface. Positioning the pot on its rolling base first eliminates this hazard entirely. Ensure the casters lock in place to prevent the pot from rolling during high winds or accidental bumps.
Filling a massive container entirely with soil is a costly mistake. It wastes expensive potting mix and creates unnecessary dead weight. Engineering a false bottom solves this problem. Follow this step-by-step framework to install a structural false bottom:
Measure the interior circumference of the pot approximately 10 to 12 inches down from the top rim.
Purchase a heavy-duty plastic planter tray that matches this exact circumference.
Wedge the plastic tray into the pot so it sits firmly at the measured depth.
Drill several half-inch holes through this plastic tray to ensure water passes through to the bottom of the main container.
Test the stability of the tray by pressing down firmly before adding any soil.
If a rigid tray does not fit your pot shape, use alternative void-fillers. Closed-cell foam blocks or empty plastic water bottles work exceptionally well. These void-fillers can safely occupy the bottom half to two-thirds of the pot. You must leave the lids on the plastic bottles. If you remove the lids, the bottles will crush under the soil weight or fill with stagnant water, defeating their purpose.
Proper drainage requires specific hole diameters and frequencies based on container volume. A standard 24-inch wide pot needs at least three to four drainage holes, each roughly one inch in diameter. A single tiny hole will inevitably clog with soil particles or root growth over time.
You must prevent filler materials from physically blocking the drainage openings. Shifting foam blocks or plastic bottles can easily slide over the holes. To prevent this, layer permeable landscape fabric over the drainage holes and the filler materials. The fabric acts as a filter. It allows water to flow freely while preventing soil migration and hole blockage. Secure the fabric tightly against the inner walls before adding soil.
Never use standard garden topsoil in containers. Garden soil is far too dense. It compacts heavily, resulting in poor drainage and suffocated roots. Instead, use specialized container potting mixes. These mixes are specifically formulated with perlite and vermiculite. These additives provide essential aeration and significantly reduce the overall weight of the soil mass.
A high-quality, lightweight potting mix ensures optimal root health in confined spaces. You can also mix in slow-release granular fertilizer to provide consistent nutrients throughout the growing season. A standard ratio for large containers is 60% premium potting soil, 20% perlite for drainage, and 20% organic compost for nutrient retention.
Landscape architects rely on proven horticultural design principles to create visually stimulating compositions. You do not need to guess which plants look good together. By categorizing plants by their structural roles, you can build balanced, professional-grade arrangements every time. We look at vertical layering, color contrast, and seasonal adaptability to ensure the planter looks intentional and refined.
This is the gold standard framework for container design. It breaks the arrangement down into three distinct vertical layers.
Thriller: This is the central focal point. The thriller must possess significant height, structural rigidity, and bold texture. Examples include tall ornamental grasses, small Japanese maples, or architectural agave plants. It establishes the scale of the arrangement and draws the eye upward.
Filler: Fillers are mid-level mounding plants. You select them to conceal the soil line and add textural contrast around the base of the thriller. Coleus, broad-leaf hostas, or dense ferns work perfectly. They bulk up the visual weight of the container and provide a lush, full appearance.
Spiller: Spillers soften the container's hard edges. You use trailing vines or cascading foliage to integrate the planter into the ground plane. Creeping Jenny, sweet potato vines, or trailing ivy spill over the rim, breaking up the rigid geometry of the pot and connecting it to the surrounding patio.
Color theory dictates the mood of your outdoor space. Monochromatic schemes work best for modern, minimalist aesthetics. Pairing a stark white square planter with purely green foliage creates a clean, sophisticated look. High-contrast, bold color combinations suit traditional or eclectic spaces. Mixing deep purple foliage with bright yellow blooms creates immediate visual impact and draws attention from across the yard.
Treat the container planting as a visually stimulating painting. Intentionally contrast plant foliage textures. Pair the broad, smooth leaves of a hosta with the fine, wispy blades of ornamental grasses. This textural friction keeps the arrangement interesting even when the plants are not actively blooming. Varying leaf sizes prevents the arrangement from looking like a solid, unreadable mass of green.
Designing a permanent evergreen base simplifies seasonal transitions. Plant a hardy evergreen shrub or dwarf conifer as your permanent thriller. This maintains year-round visual interest and structure. You can then rotate seasonal fillers and spillers around this permanent base. Plant bright annuals in the spring, swap them for hardy mums in the fall, and use decorative pine branches in the winter.
Always address root-space requirements when combining multiple species. Ensure the permanent thriller has enough room to establish a deep root system. Do not overcrowd the seasonal fillers, as they will compete aggressively for water and nutrients. Leave at least two inches of space between the root balls of new additions to allow for seasonal growth.
Exposed potting soil looks unfinished and dries out quickly. Top dressing provides both functional and aesthetic benefits. Cover the exposed soil with a layer of river rock, polished pebbles, or Spanish moss. This layer retains moisture, suppresses weed growth, and provides a finished, professional look. It also prevents soil from splashing onto the patio during heavy rain.
Integrate illumination to extend the planter's impact into the evening. Place small solar uplights or hidden LED spotlights within the foliage. Angle the lights upward to highlight the thriller plant and cast dramatic shadows against nearby walls. This lighting strategy highlights the architectural shape of the planter at night, turning it into a 24-hour focal point.
Execute your container gardening project by following these exact steps:
Measure your intended space to ensure the container geometry leaves ample room for foot traffic and door clearances.
Calculate the required soil volume and source lightweight void-fillers to build a structural false bottom.
Verify drainage capabilities by drilling appropriate holes and installing permeable landscape fabric over the openings.
Select a container material that withstands your local frost-thaw cycles before purchasing any plant material.
Draft a planting schematic using the thriller, filler, and spiller methodology to ensure proper vertical layering.
A: You should use lightweight void-fillers to save soil and reduce weight. Empty plastic water bottles with the lids screwed on tightly are highly effective. Closed-cell foam blocks or inverted plastic nursery pots also work well. These materials can safely occupy the bottom half to two-thirds of the container.
A: Use lightweight fiberglass or resin containers instead of concrete. Build a false bottom using empty plastic bottles to eliminate heavy, unnecessary soil volume. Always use a lightweight potting mix containing perlite. Finally, place the empty pot on a heavy-duty rolling plant caddy before filling it.
A: Yes. Tall planters hold a larger volume of soil, which creates heavier downward water pressure. They require multiple, wider drainage holes to prevent water from pooling at the base. You must also ensure that deep void-fillers do not shift and block these holes under the soil's weight.
A: Fiberglass and high-density resin composites are the best materials for freezing climates. They are non-porous, meaning they do not absorb moisture. Because they lack trapped water, they will not expand, crack, or shatter during intense winter frost-thaw cycles.
A: Cut a piece of permeable landscape fabric and lay it directly over the drainage holes and void-fillers before adding soil. The fabric acts as a barrier. It allows water to drain freely while preventing dense potting soil from migrating downward and clogging the holes.
A: A 24-inch container typically supports one central thriller, three to four mounding fillers, and three trailing spillers. You must adjust this based on the mature root size of the selected species. Avoid overcrowding, which leads to aggressive competition for water and soil nutrients.
A: Yes, you can safely leave high-quality fiberglass and resin planters outdoors all winter. Their non-porous construction prevents water absorption, making them highly frost-resistant. However, you should ensure the soil drains properly before freezing to protect the root systems of any overwintering plants.


